Follow the steps below to set up and start using iCheckout.
iCheckout is a powerful conversion optimization WooCommerce plugin that, when configured properly, helps you boost your conversions, average order value, and ROI in general.
Here are the steps to follow to set it up properly. If you face any issues during the process, please contact our support in the bottom right corner chatbox.
Install the app
Visit this page and download iCheckout to your shop. After you install and activate it, go to the “Design” page to set it up.
Enable your tracking
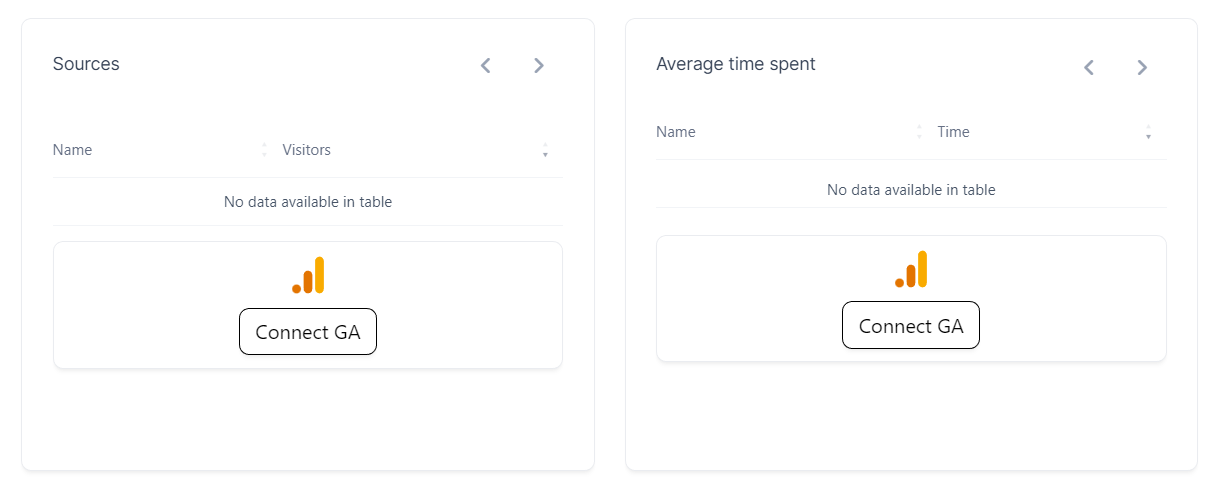
Go to iCheckout -> Dashboard and hit the “Connect GA” button within the Analytics part.
Once the pop-up shows, hit “Authorize” to select the Google Analytics account you want to sync within your analytics dashboard.
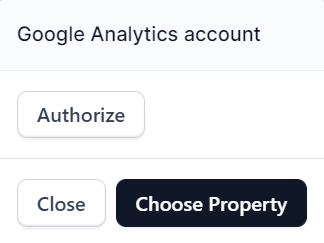
Choose your Google account, and the analytics will be synced in a moment.
Note: iCheckout needs this access to connect with your Google Analytics data, update your metrics and data, and show it within your dashboard analytics.
Here is how the iCheckout dashboard will look after you finish all the steps mentioned.
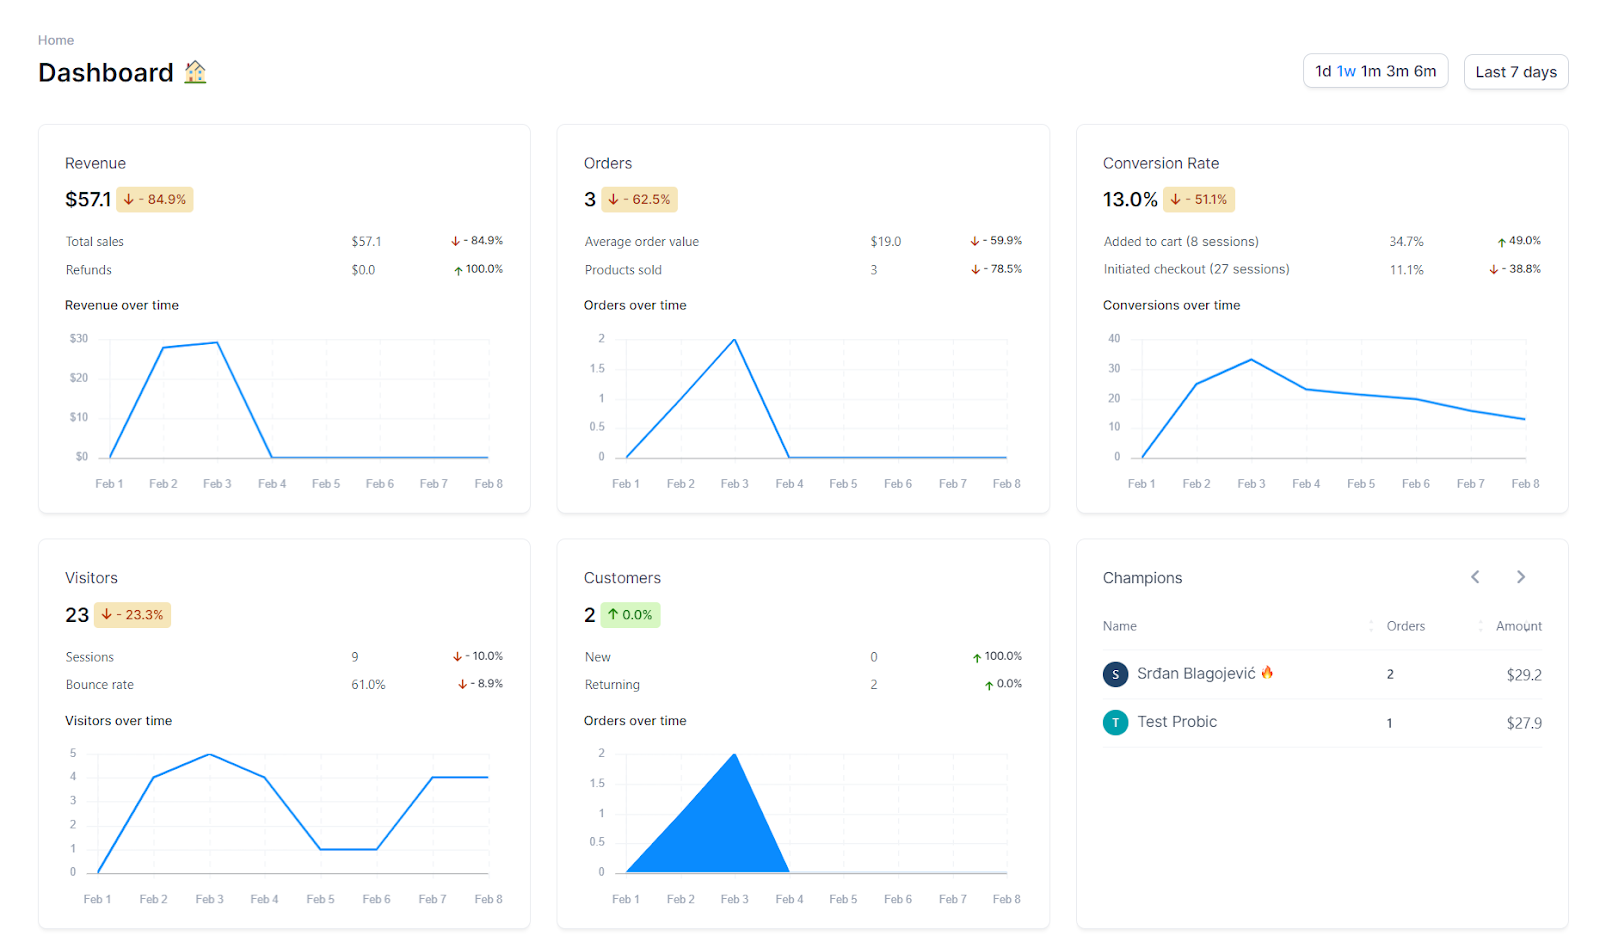
Note: Check this article for more detailed information about the dashboard metrics and what they exactly show.
Choose your checkout template
Within the iCheckout plugin, you can choose a template depending on which you want to use in your online store – whether one-page or multi-step checkout.
To do that, first, go to iCheckout -> Design.
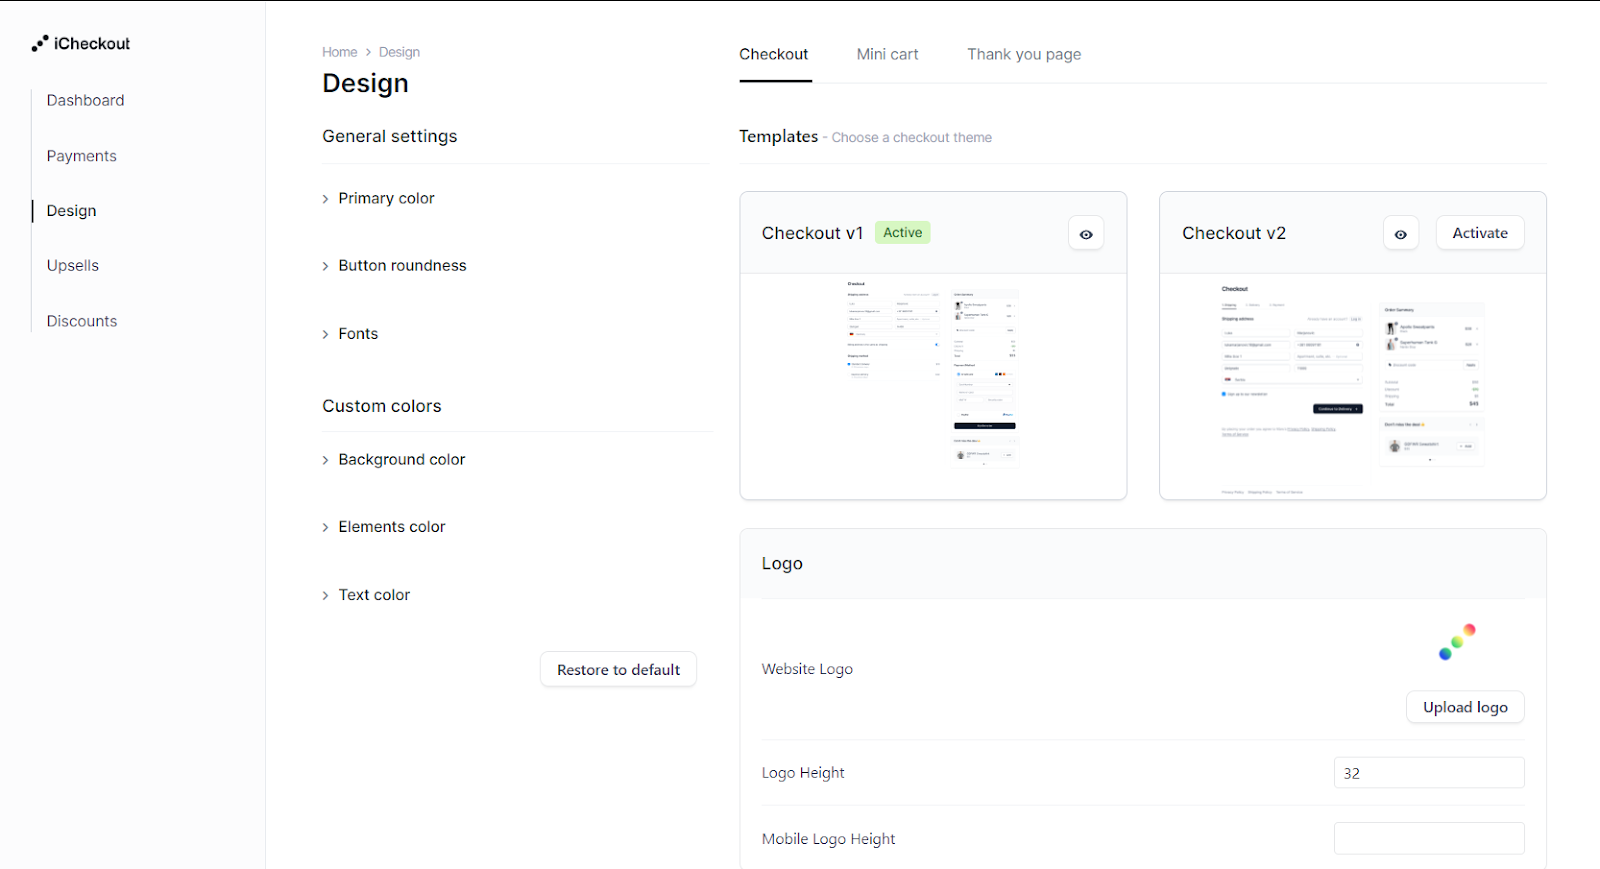
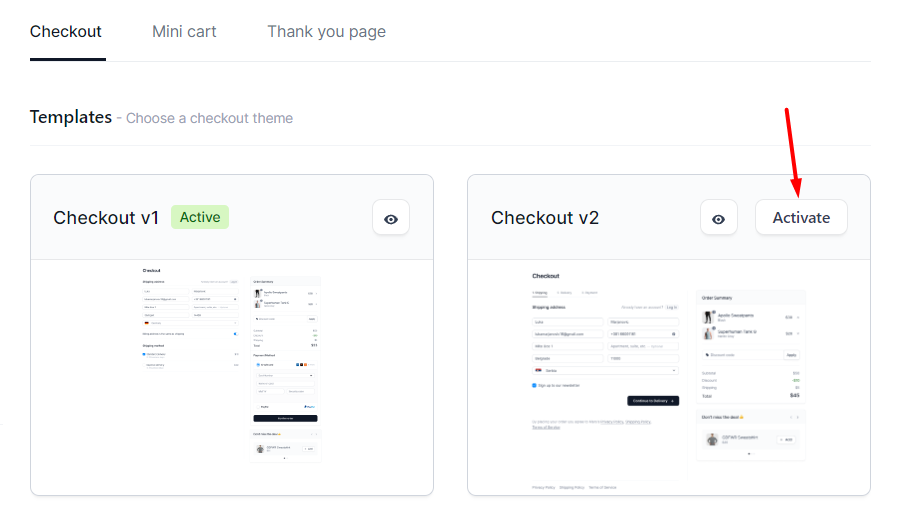
Under the Templates section, you can choose the checkout page that fits your needs and preview it before activating.
Once you decide which template to apply, hit “Activate,” and you’re ready to go.

One-page checkout
Within the iCheckout, you can use one of the various customizable templates as your checkout page.
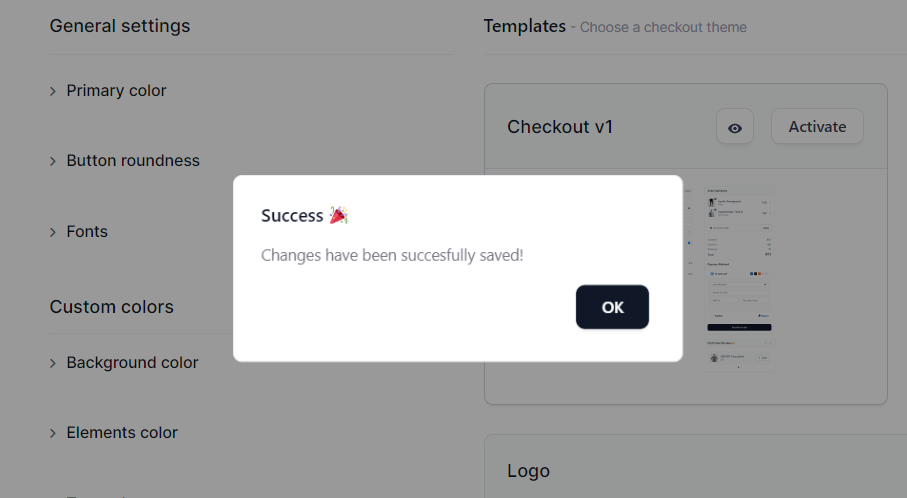
If you want to use one-page checkout, just choose the template that fits your needs, and hit “Activate.”

The following message will pop up.
Note: We explained how to customize your checkout page and adapt it according to your brand down below, so make sure to check it out.
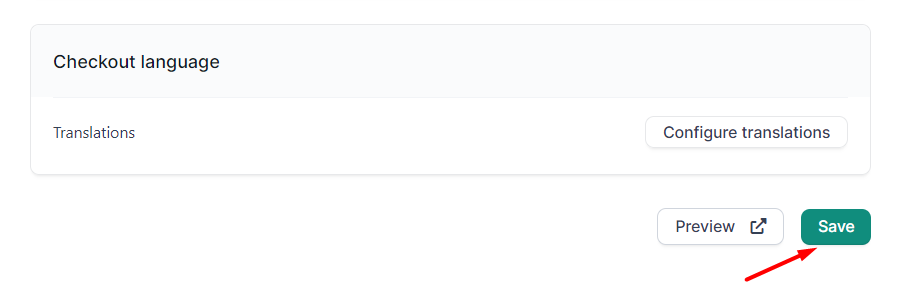
Once you’re done with the customization of your checkout page, hit “Save” to apply your changes.
Multi-step checkout
Within the iCheckout, you can use one of the various customizable templates as your checkout page.
If you want to use multi-step checkout, just choose the template that fits your needs, and hit “Activate.”
The following message will pop up.
Note: We explained how to customize your checkout page and adapt it according to your brand down below, so make sure to check it out.
Once you’re done with the customization of your checkout page, hit “Save” to apply your changes.
Customise your checkout
To customize your checkout page and adapt it according to your brand, just go to iCheckout -> Design -> Checkout.
Here you can choose the checkout template(one page or multi-step), upload the logo, and policy URLs, switch the fields you want to provide on the checkout page, add custom sections, and customize fonts and colors according to your brand.
So let’s go through each segment to help you prepare it for growth.
Within this section, you’ll see checkout templates that you can choose according to your needs.
To preview each template before activating it, just click on the “Eye” icon in the top right corner of the template’s box.
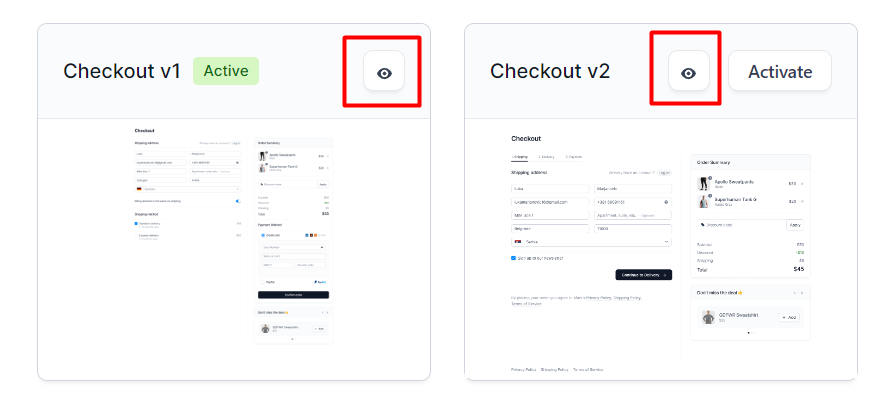
You’ll be shown a preview of the checkout template.

To activate the specific checkout template you want, hit the “Activate” button in the top right corner of the wanted checkout box.
Include your logo on the checkout page
To include your logo on your checkout page, all you have to do is click on the “Upload logo” button.
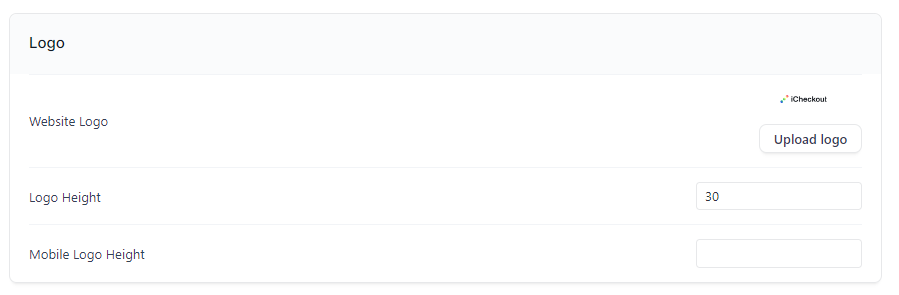
Choose an image from your gallery or upload your logo directly, and adjust the logo’s height both for mobile and desktop. Once you’re done, hit the “Save” button.
Insert Policies to your checkout page
Include your policies just navigate to the policy section and includes the URL of your “Returns policy page”, “Privacy policy” and “Terms and conditions page.”
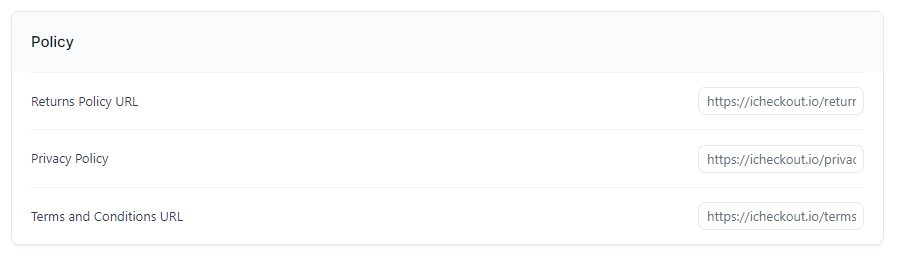
Once you’re done, hit save to apply the changes.
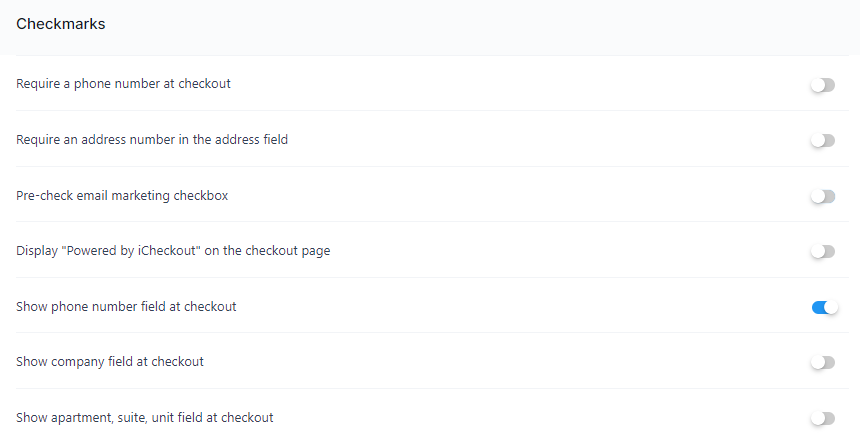
Customize the fields on your checkout page
Having non-necessary Fields on your checkout page can just drive away your potential customers. That’s why you should ensure you have only the important Fields.
Fortunately, you can choose which fields to show on your checkout page.
Just navigate to your field section within iCheckout’s Design section and choose which Fields you want to include or exclude.
You can choose whether to switch ON/OFF the following options:
- Require a phone number at checkout
- Require an address number in the address field
- Pre-check the email marketing box
- Display “Powered by iCheckout” on the Checkout page
- Show phone number field at checkout
- Show company field at checkout
- Show apartment, suite, and unit field at checkout
Let’s say, for example, that you want to have a phone number Field on your checkout page, but you don’t want it to be required.
To do that, switch on the “Show phone number field at checkout” option and make sure that the “Require a phone number at checkout” option is switched OFF.
Here’s how it will look like:
Once you’re done, hit the “Save” button.
Note: If you, for example, switch on “Require a phone number at checkout,” then “Show phone number field at checkout” will be enabled automatically. That’s because you cannot require a field that is not shown.
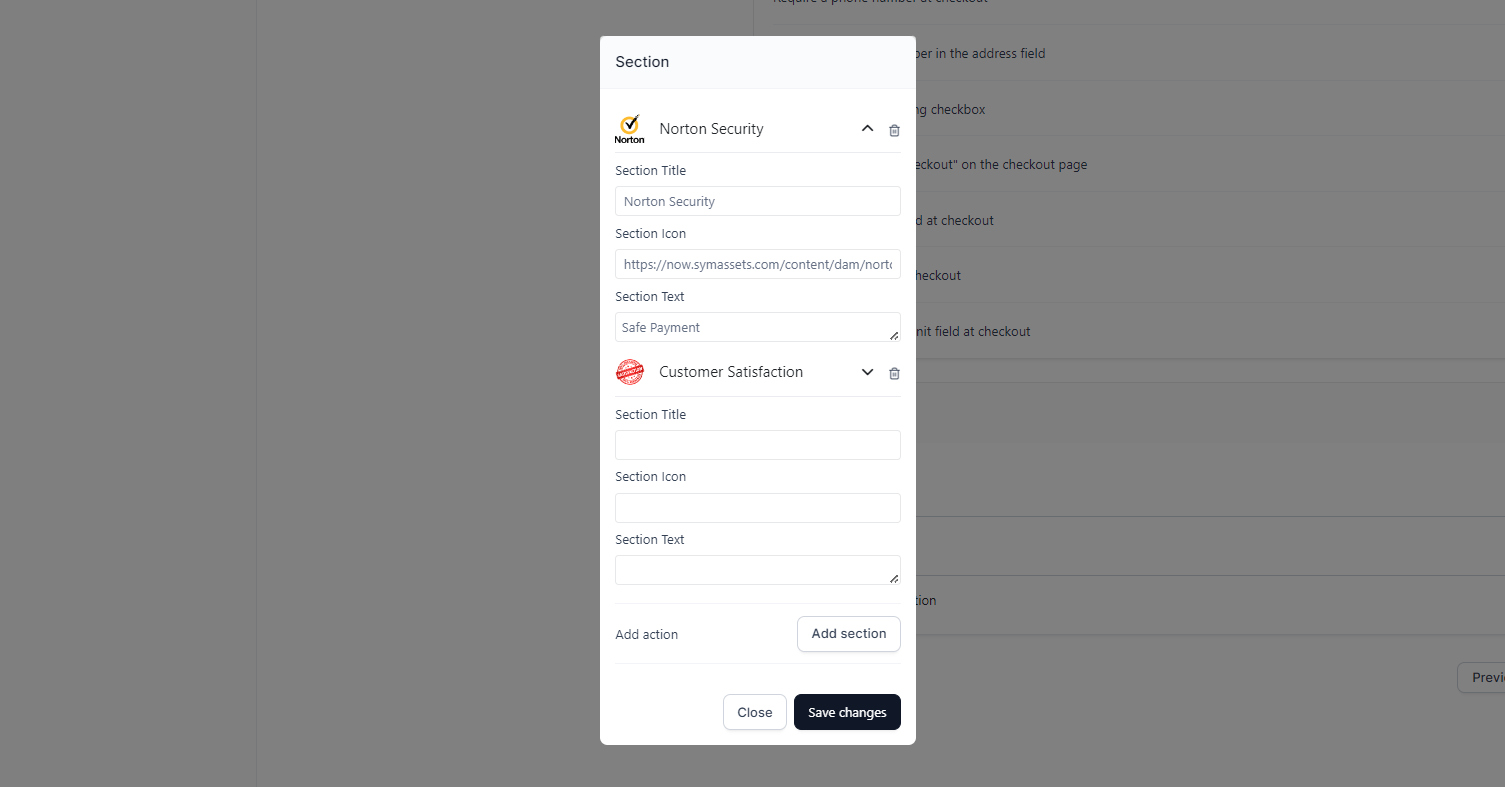
Add custom sections to your checkout page
Adding custom sections to your account page can improve your authority, make your customers purchase faster, and make your website look more secure.
Here within the custom sections, you can add security badges, customer satisfaction and guarantee badges, free shipping badges, or whatever comes to your mind.
Just hit “Edit sections,” insert the Section title, Section icon through the URL, Section text, and after you’re done, click “Save changes,” and then “Save.”
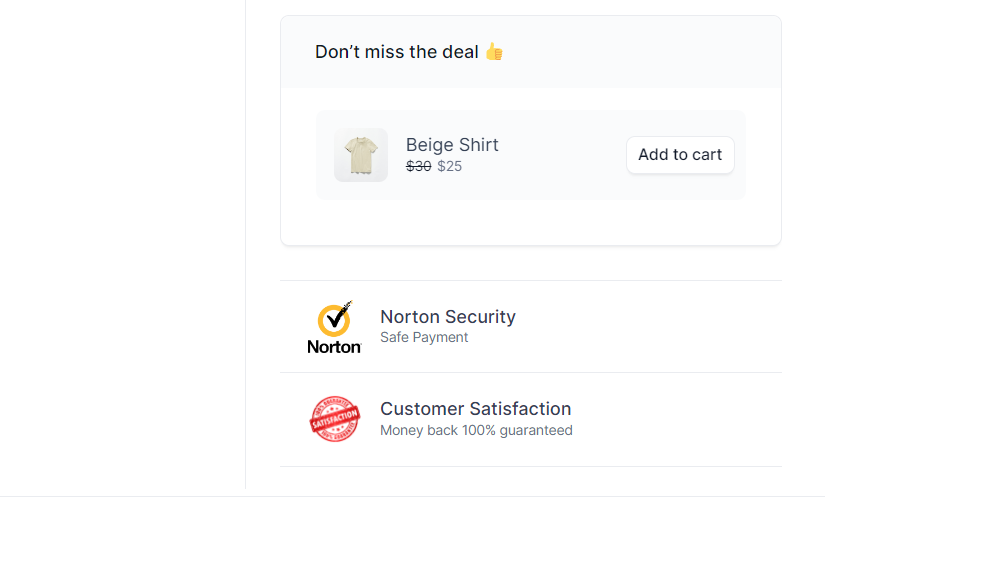
It will be positioned under the Upsell section on your checkout page. Here’s an example of how it looks:
If you want to edit sections, just click on the Edit Sections button, and here you can delete every single section one by one, or you can edit the specific one the same way you used to create them.
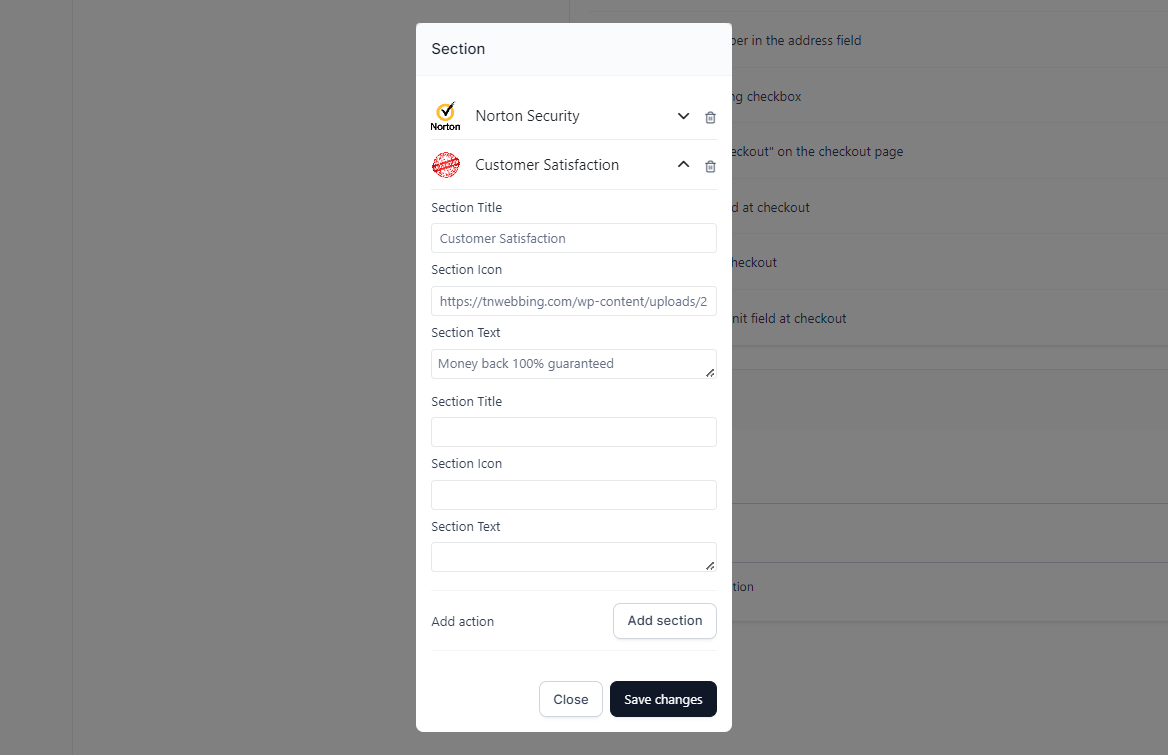
Once you’re done hit “Save changes” and then “Save.”
This is how you can add custom sections on your checkout page to improve your store’s trustworthiness, which will help you increase conversions.
For more information, check out our other help articles about the customization that iCheckout provides.
And if you face any issues during the process or have some questions, please contact our support in the bottom right corner chatbox.
Adapt your checkout colors, fonts, and fields according to your brand
Once you choose the checkout template you want to use on your store, you can adapt its color, fonts, and fields according to the rest of your store design.
There are six parts you can customize on your checkout page within the general settings:
– Primary color
– Button roundness
– Fonts
– Background color
– Elements color
– Text color
How to know which part I’m customizing?
Colors
To find out which part of the checkout you want to customize, navigate to the preview button.
There you have points that show each segment of your checkout page that can be customized.
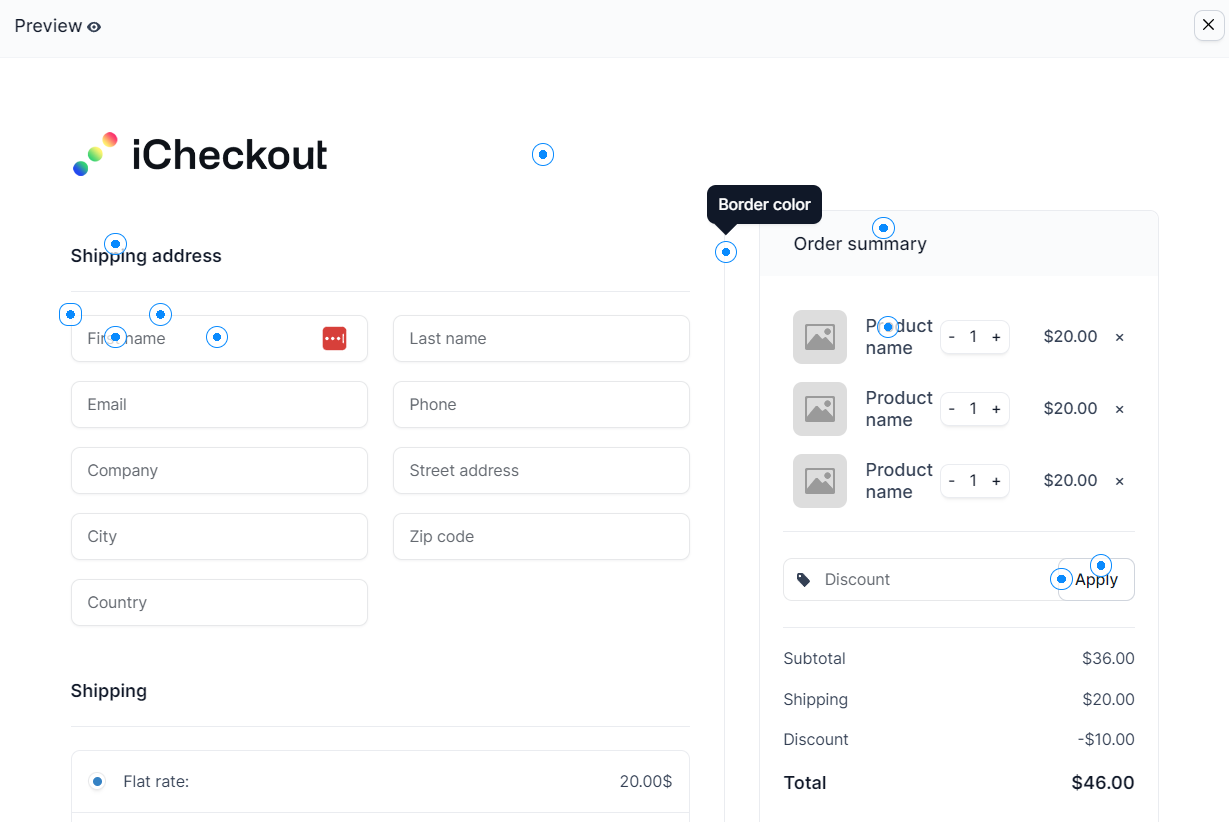
Just hover on the part that you want to customize within the preview screen (e.g., Border color) and then find it within the elements to adjust the color of your borders.
Choose the color of your wish by including the HEX color code.

You can see how it will look by navigating to the Preview section.

Once you’re done with your customizations, hit “Save,” and you’re ready to go.
If you want to restore the default colors for any part of your checkout page, just find the specific color you want to restore and hit “Default.”

Once you’re done, save your changes, and all of the changes will automatically be applied.
The process is the same for each section within the “General settings.”
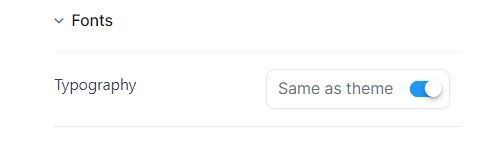
Fonts
Within the “Fonts” section, you can adapt the checkout fonts according to the rest of your website to be aligned.
Just navigate to the section, and hit select “Same as theme” if you want them to be adapted.
Depending on the theme that you’re using on your website, for some themes you won’t be able to automatically pull out the typography.
In that case, you’ll need to set it up manually.
Just deactivate the “Save as theme” option, and set the fonts that your theme is using.
To check that, navigate to your theme settings, and within the fonts section, you’ll be able to check the font family, weight & style, and font subsets.
Once you’re done with settings, hit “Save,” and the fonts will be applied to your checkout.
Roundness
Depending on the buttons on your website, you can adapt their roundness on your checkout page.
To do that, just navigate to the “Button roundness” section, and here you can leave it by default.
This way, the button roundness will be aligned with the template you’re using.
And if you want to adapt it to the rest of your website, just check the roundness of your buttons within the theme settings, and then turn off the “Default” section.
Enter the number for your button roundness in pixels.

Once you’re done, hit the “Save” button.
Activate your mini-cart
Go to iCheckout -> Design -> Mini Cart and enable the mini-cart option if you want to use it.
Check out how to activate and set up your mini-cart in detail here.
Add upsells
Go to iCheckout -> Upsells and add your upsells that will be triggered during the buying process.
Create automatic discounts
Go to iCheckout -> Discounts and add your discounts.
Now you’re ready to go!
FAQ
What to do after I set up my checkout?
iCheckout gives you a lot more when it comes to conversion optimization, so feel free to check our guides on upsells. You could also add a mini-cart feature following our article. For more information, check out our articles about the features and integrations that iCheckout provides you with.
