
Learn how to set up an upsell and monitor its performance using our built-in performance metrics.
To create an upsell, first navigate to iCheckout > Upsells > click on “+Create Upsell”

Enter the Upsell Title and Priority
First, add a specific title for your new upsell.
This is mandatory when creating an upsell to help you differentiate them within the dashboard.

Once you’ve entered the title, the next step is to set the priority level.
You can choose between three priority levels:
- High
- Medium
- Low
What’s the purpose of setting the priorities?
Note: In case two or more upsells are present and triggered, the system will first show the upsell with the highest priority.
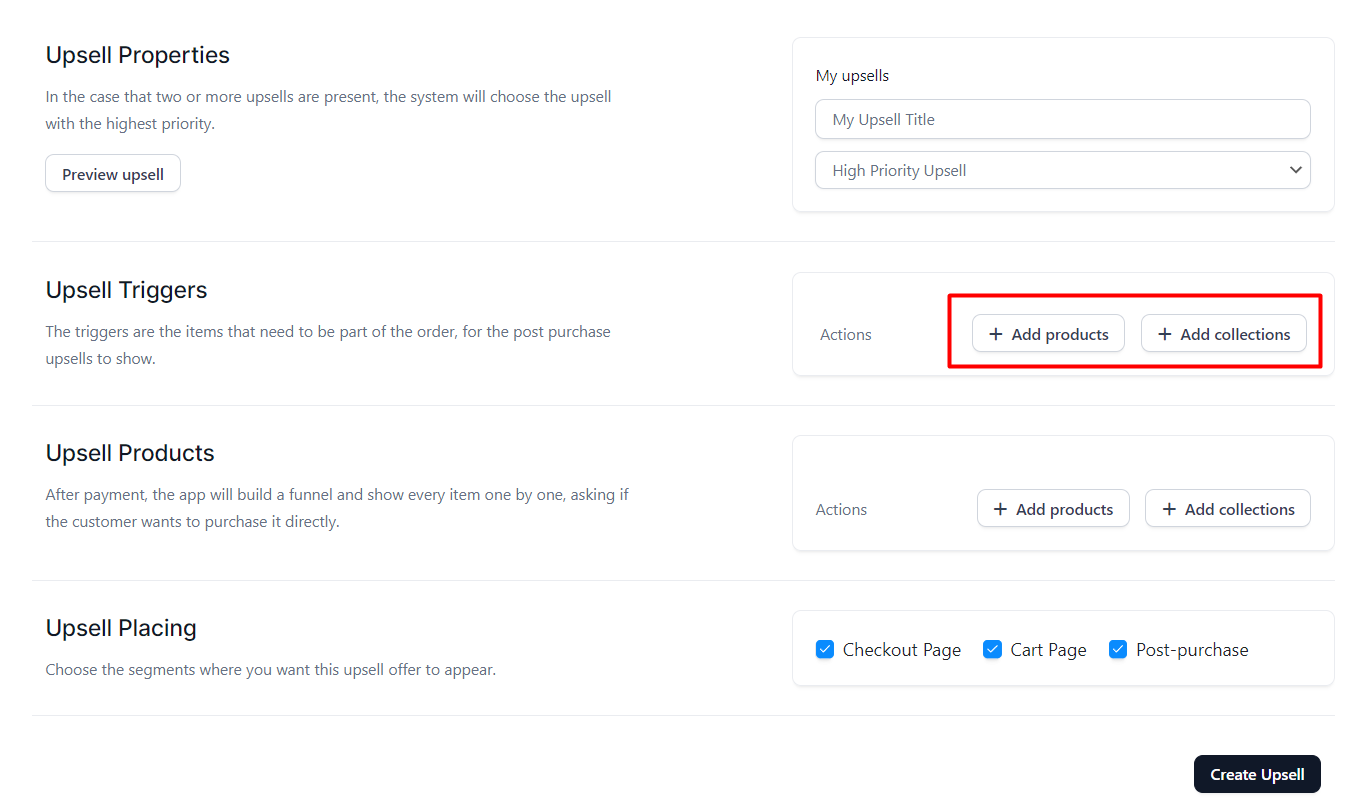
Choose the Upsell Triggers
The upsell trigger is a product that the customer added to their cart.
This product triggers a specific upsell to appear.
Your triggers can be products or collections, but we don’t recommend mixing both trigger types.
To add a trigger, follow the steps below:
Step 1. Click on “Add Products” or “Add Collections”
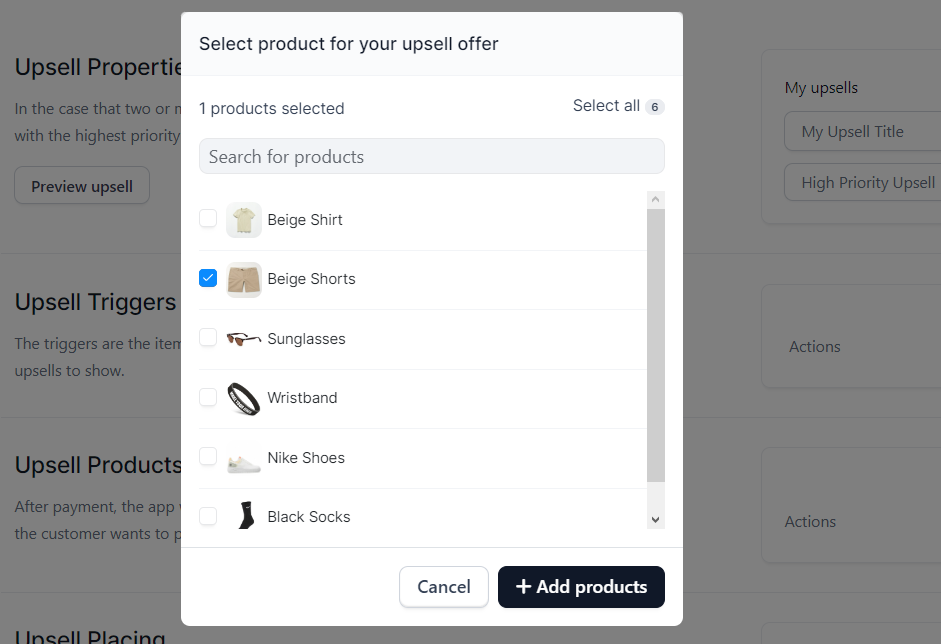
Step 2. Pick the product or collection you want to use as a trigger and click “Add Products.”
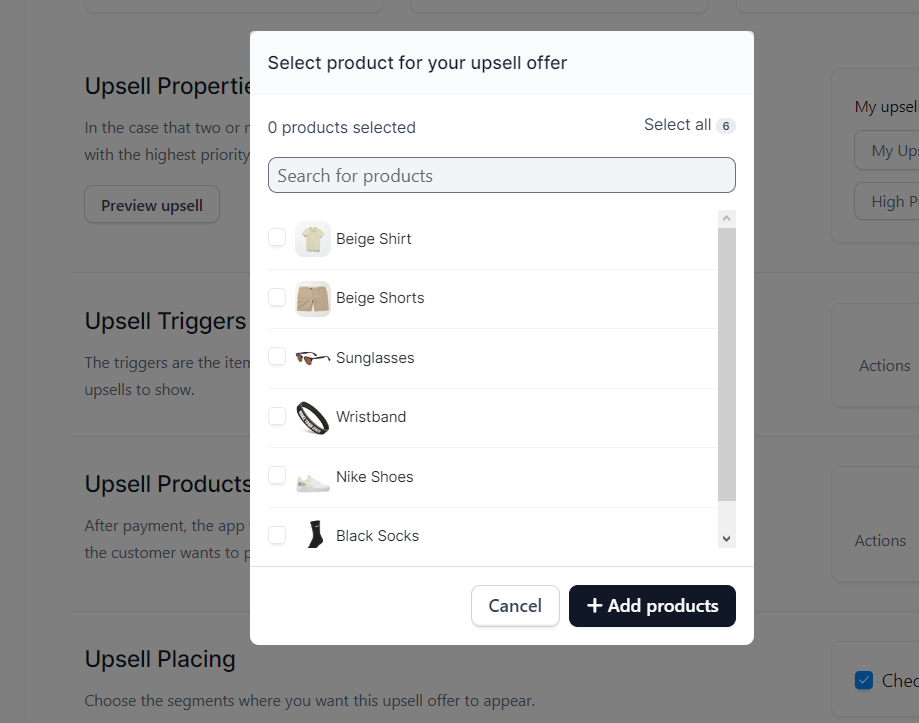
You can also use the search bar to find a specific product or collection in case you have dozens of products.
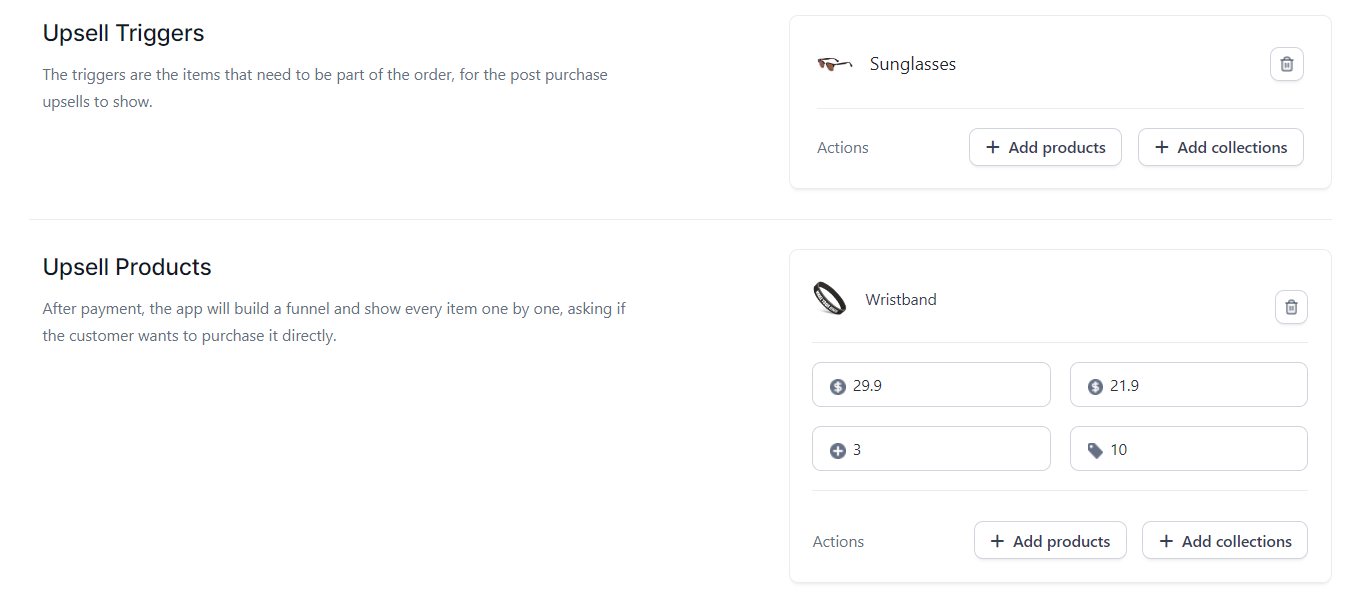
Choose the Upsell Products
Select the products that you want to upsell by creating up to 3 product upsell offers.
To select your upsell products, follow these steps:
Step 1. Click on “Select a product or collection” to select your upsell product.
You can also use the search bar to find a specific product.
Once you choose the product you want to use as an upsell, click “Add Products.”
What’s great about the upsell triggers and products is that you can choose them to be your product variants.
So, for example, if you want to connect specific colors of products(green socks with green shoes) or whatever type of variant you have, you can do so.
Edit product upsell variants
You can edit each product variant offer by editing its default and discount price.
On the other hand, you can also create a quantity discount for each upsell product in case you want to offer it.

For example, let’s say you want to offer white socks as an upsell with white shoes.
After the customer adds the first upsell(pair of socks) to their cart, you want to offer the same product as an upsell with a 50% discount on the 2nd upsell to increase the customer’s cart value.
That’s exactly what you can do within this section.
Here’s what those 4 sections are setting for:
- Custom Compare Price – The price that you want to be displayed as a regular product price within the upsells
- Custom Price – The price that will be displayed as a discounted price within the upsells
- Default Quantity – The number of upsells in the cart where the discount starts to be applied(e.g., If the default quantity is 3, then the 3rd upsell will be displayed with a specific discount you set).
- Discount – Percentage discount that will be counted for the specific upsell product
So here’s what it will look like in reality based on the following example:
Custom compare price:
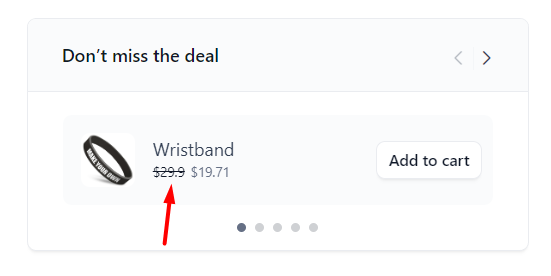
Custom price:

Quantity = 3 – meaning that the third upsell of a specific product will be discounted.
Discount – after the user adds 2 products to the cart with the old price, the upsell with the new price appears:
Upsell placing
Here within this section, you can choose where you want to display your upsell offers.
It’s up to you whether you want to show them within the Mini cart, Checkout, post-purchase, or all the three ones.
You can choose to upsell to be visible within all three places or none.

All you have to do is check where you want the specific upsell to appear.
Once you’re done, just hit “Create upsell.”
Upsell dashboard
Here, you can see the final results of the setup of your upsell by checking what products the customers are buying and what offers are currently active/inactive.

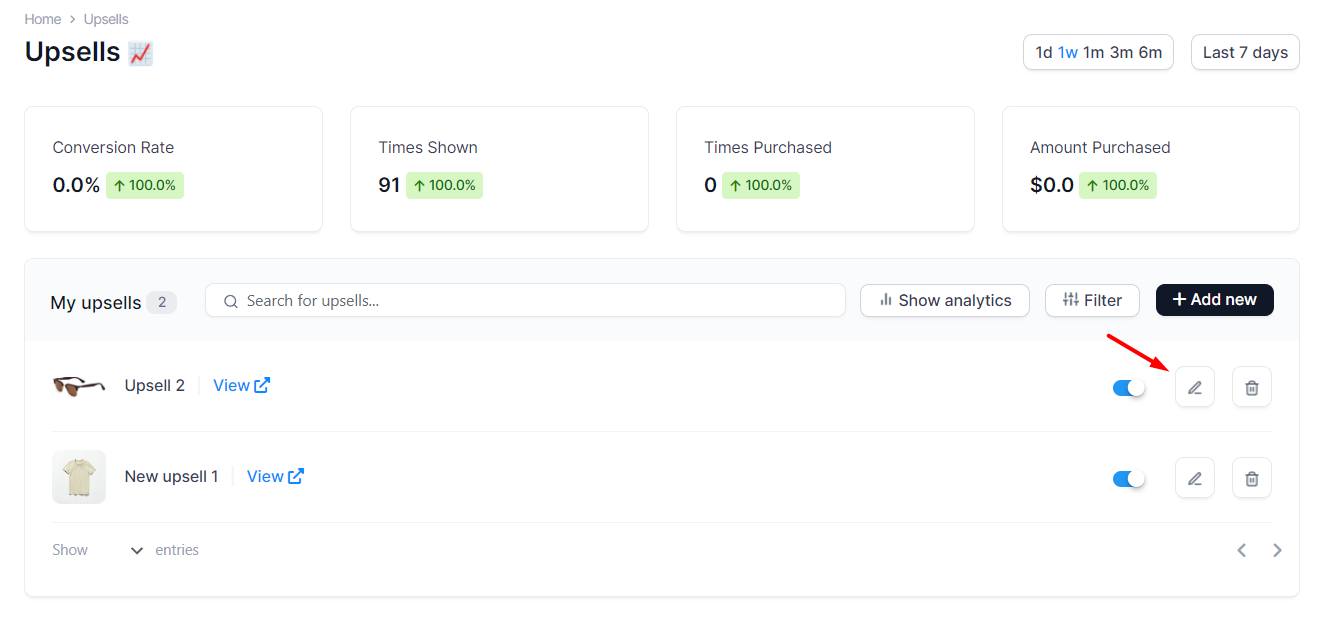
Here, in the “My upsells” section, you can activate or deactivate already created upsells by switching the toggle button.
By switching the upsells OFF, your currently running upsells will be paused, so you can save all the setup and activate them again whenever you want in the future.

You can also preview the upsell by clicking the “View” button.

Update or Delete Upsell
Update upsell
If you want to edit any upsell, all you have to do is follow the next steps:
Step 1. Click the “Edit” button.
Here you can edit everything, starting from the Upsell properties all the way to the Upsell placing.
Once you’re done with editing, hit the “Save” button at the bottom right to apply all your changes.

Delete Upsell
If you decide you don’t need a specific upsell, you can simply delete it from the “My upsells” section.
Just hit the “Delete” button, and once the popup shows, click “Delete.”

Upsell Performance Metrics
Each upsell has its own built-in performance metrics, so you could monitor it in detail based on the period of time that you want to review.
You can select the period of time you want to monitor by selecting the day in the top right corner above the metrics.
Choose the predefined dates, such as:
- 1d – 1 day
- 1w – 1 week
- 1m – 1 month
- 3m – 3 month
- 6m – 6 months
- from date to date – Here you can select any date you want to see the metrics for
Once you set the date, the metrics for that period will be automatically displayed.

Here is what the overall and individual upsell metrics section include:
- Conversion Rate – average percentage of conversions per upsell interaction
- Times Shown – number of times the upsell was shown to your customers
- Times Purchased – number of times the upsell was purchased
- Upsell Revenue – the total amount earned by your upsell
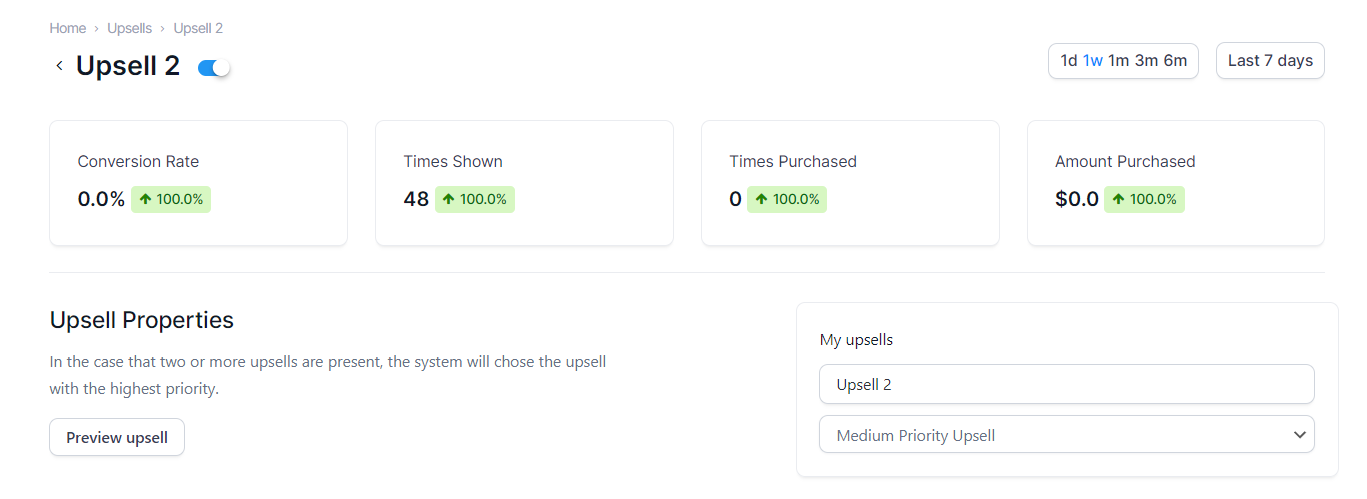
To see details for specific upsell, you can do it in two ways.
The first way is to click on a specific upsell to open it, and the performance for that upsell will be displayed within the metrics top bar:
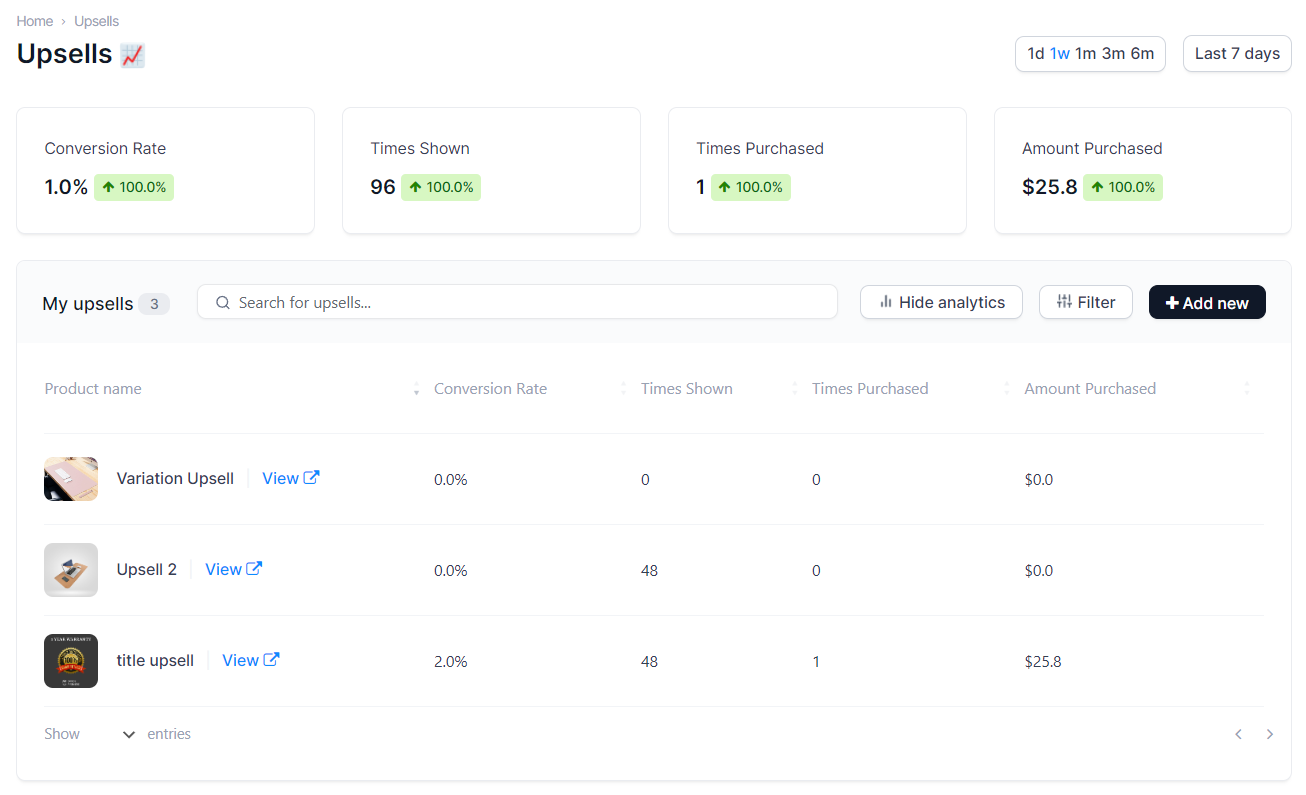
The other way is to click the “Show Analytics” button within the “My upsells” dashboard, and the performance of all your upsells will be displayed.
Sort and filter
Here you can sort upsells based on any displayed metric in descending or ascending order just by clicking on it:

On the other hand, if you have a lot of upsells created within the iCheckout, you can filter them based on the following parameters:
- Status(Active, Inactive)
- Collection – if you want to filter a specific collection of products
- Display – based on your upsells’ placing (Checkout page, Mini-cart, Before Thank You Page)
- Upsell product offer – based on products that are used within the upsells
- Custom price – based on the custom price of specific upsell
- Conversion rate – based on your upsells conversion rate
- Times purchased – based on times your upsells were purchased
- Amount purchased – based on the amount that has been purchased for specific upsell
Congrats! You’ve successfully created your upsell strategy, adjusted your offers, and learned how to monitor your upsell performance.


