
WooCommerce’s customization nature plays a huge role in WordPress being considered the most popular eCommerce solution.
Almost anyone can use WooCommerce features and extensions to create a store that suits their customers’ needs.
However, sometimes you may want greater control over your website’s look and functionality.

By customizing your WooCommerce product pages, checkout page, and store functionality, you can generate more sales and improve your conversion rate from website visitors.
To make your eCommerce website stand out and to create a unique shopping experience for your customers, you’ll have to customize it.
One of the specific pain points for WooCommerce store owners is the default product and checkout pages that come by default.
Store owners are usually looking for new ways to optimize these pages so they can:
- Increase conversions.
- Improve the customers’ shopping experience.
- Improve average order value, lifetime value of their customers, and more.
Thankfully, using the proper techniques and plugins, you can extensively customize the WooCommerce pages to improve these parameters.
We’ll go through what you need to know before starting and then take you through the process of updating your WooCommerce site’s checkout process.
In this article, we’ll dig into the more advanced ways on how to customize WooCommerce.
How to setup WooCommerce on your WordPress site
First, you have to buy a domain name and hosting.
Here are some of the hosting companies for WordPress:
Then you need to install the WooCommerce plugin on your WordPress site.
How to customize the WooCommerce product page
After installing WooCommerce on your website, the product page will, by default, look like this:

It’s not that bad, but it can be much better after changing some parts to improve the shopping experience.
We’re showing you an easier way to get this done without modifying your theme’s files and how to customize the WooCommerce shopping page using the page builder.
Using page builders, it’s easy to change the shopping page design, layout, product types, and products to display.
Whether using Elementor, Visual Composer, or any other page builder plugin, this method of creating pages can be done using any of them.
Note: Using page builders, you do not need to write any line of code, but it’d help if you’re familiar with WooCommerce shortcodes.
So, now let’s take a look at how to customize your WooCommerce shopping page using a page builder.
You can do this with two steps:
1. Choose a pre-designed product page template
2. Build a product page from scratch
Step 1: Choose a Pre-Designed Product Page Template, or build one from scratch
The easiest way to get started and get the product page done is to use a pre-designed product page template and customize it to fit your website’s needs.
Using Elementor, there are several different templates of product pages to choose from.
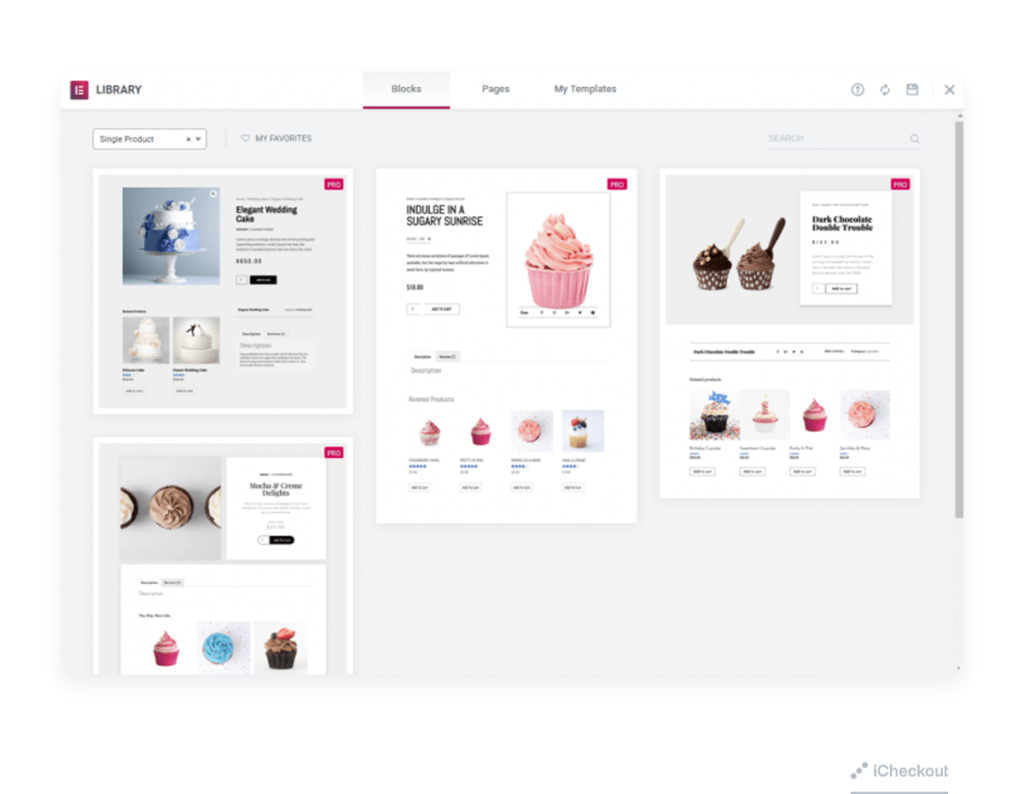
After you choose the page that fits your needs, you have total customization control over the product page and its style.
The other option is to build your product page from scratch. In Elementor’s editing panel, you can see the special widgets for the product.
First what you have to do is create a new page:
In your WooCommerce shop, you can choose what products you want to display on it. For example, you can create a shopping page that shows featured and best-selling products.
To add some content to the page, you can use some WooCommerce shortcodes. You can use many shortcodes based on the product categories you want to display.
These are some of them:
- [featured_products]
- [top_rated_products]
- [sale_products]
- [recent_products]
- [best_selling_products]
- [products]
Let’s, for example, add featured products to the shopping page using the shortcode. The principle for the other categories is the same.
To do this:
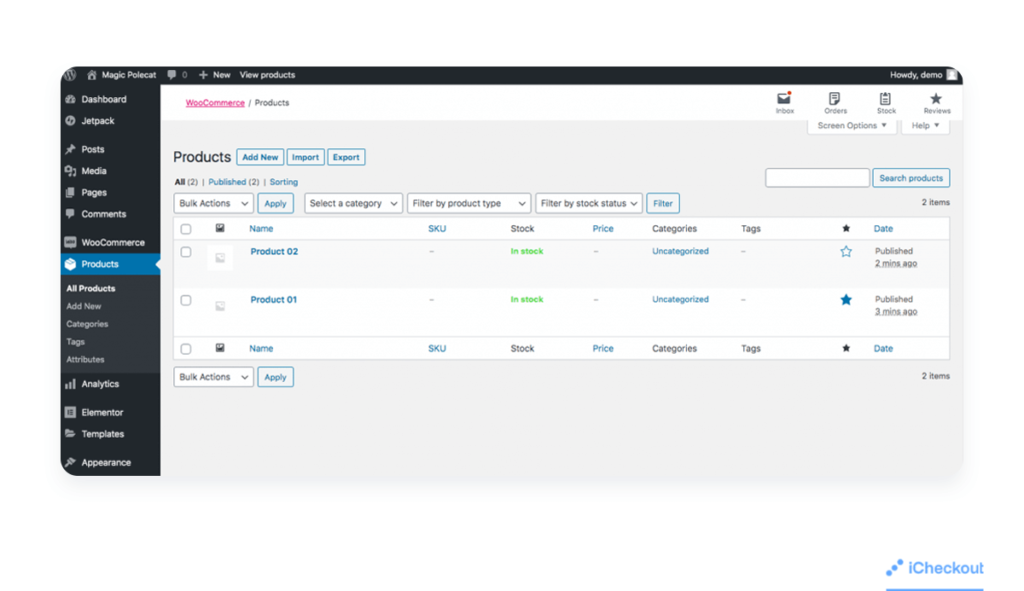
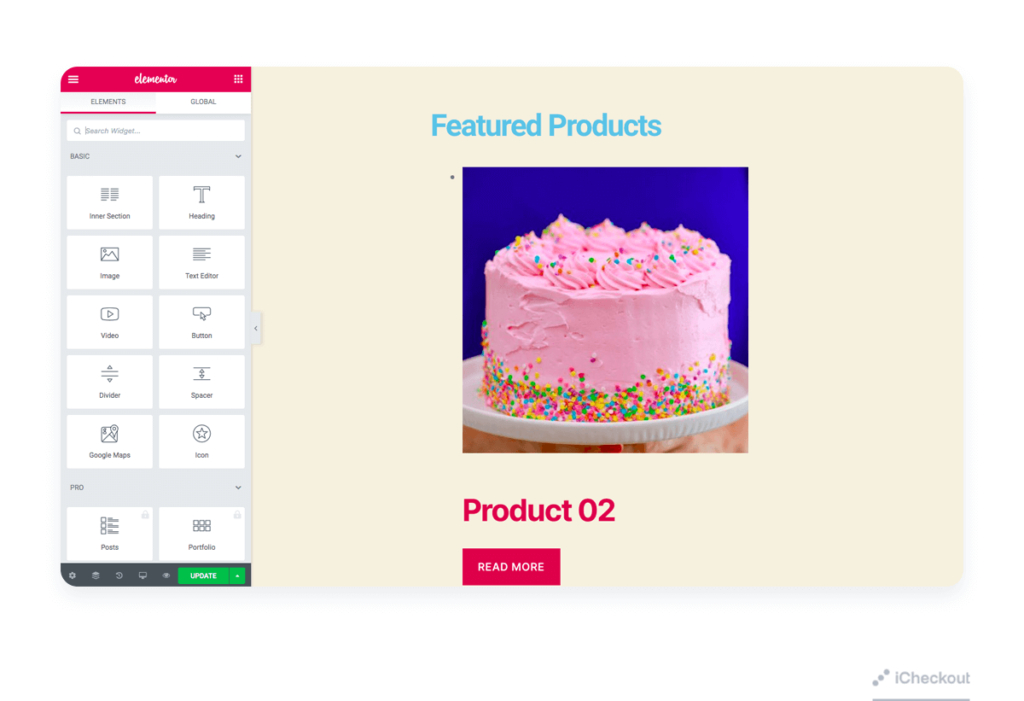
Go to WordPress admin dashboard > Products page. To mark your featured products click the star icon on the right side.
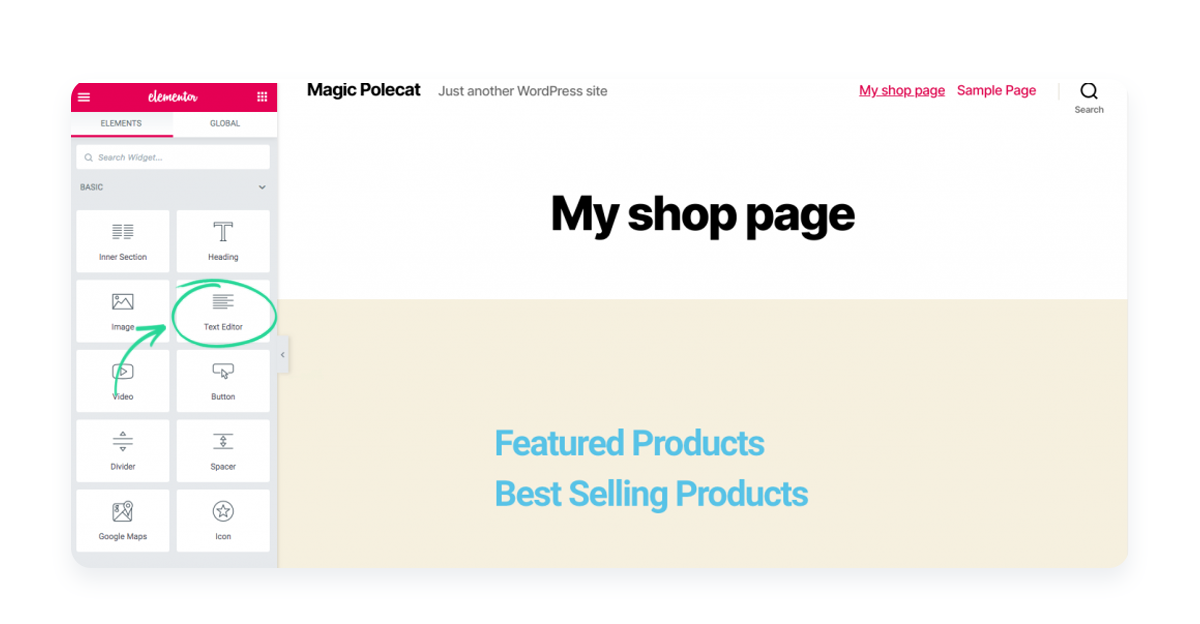
Then, drag the Text Editor below the Featured Products from the editing page.
Copy the shortcode [featured_products] and paste it into the Text Editor window.

Click Update, and your featured products will be displayed on this page, just as shown below:
You can also use this for the best-selling products, using the [best_selling_products] shortcode, and so on.
Decide what products you want to display on your shopping page to provide the best shopping experience.
Also, keep in mind that there are shortcodes that you may need to set the number of columns or limit the number of displayed products.
For example, let’s say that you want to display 3 columns of 5 products max. You’ll need to use something like this:
- [products limit=”5″ columns=”3″]
Shortcodes are excellent because they are compelling and easy to use.
Let me show you how to display the table or any other element on a new page using the shortcode.
To do that using a page builder, click Pages > Add New and enter the page’s name.
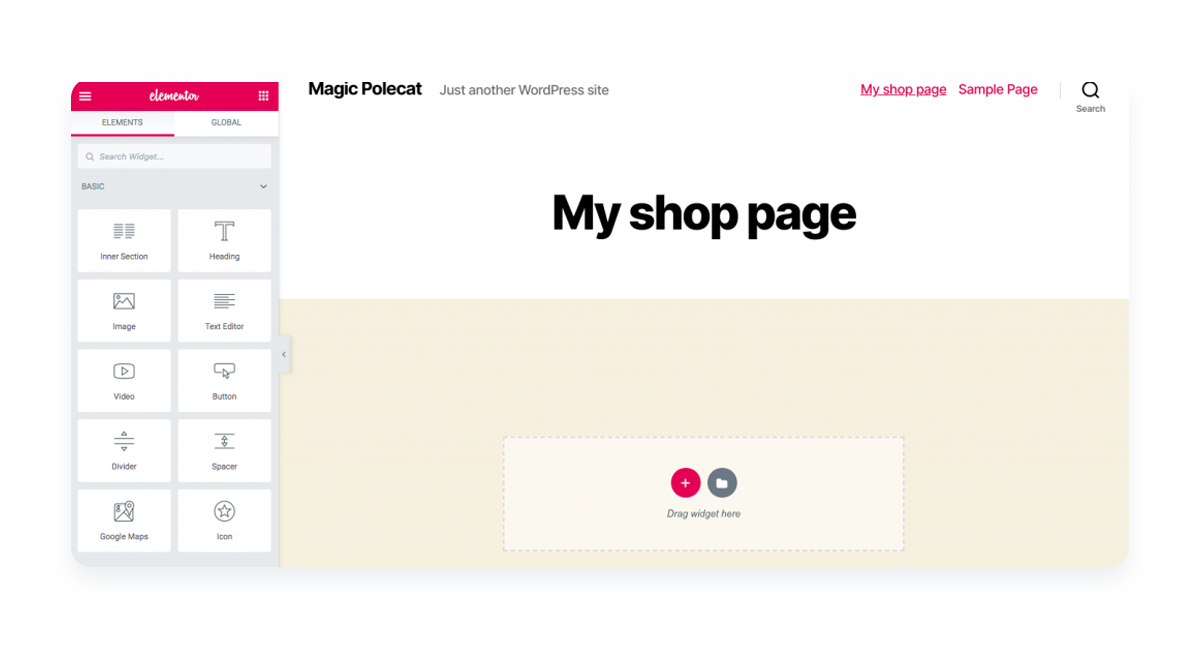
For example, the WooCommerce page. If you are using Elementor as your page builder, you will see this:

Just drag the Text Editor down to the page and paste the shortcode you just copied.
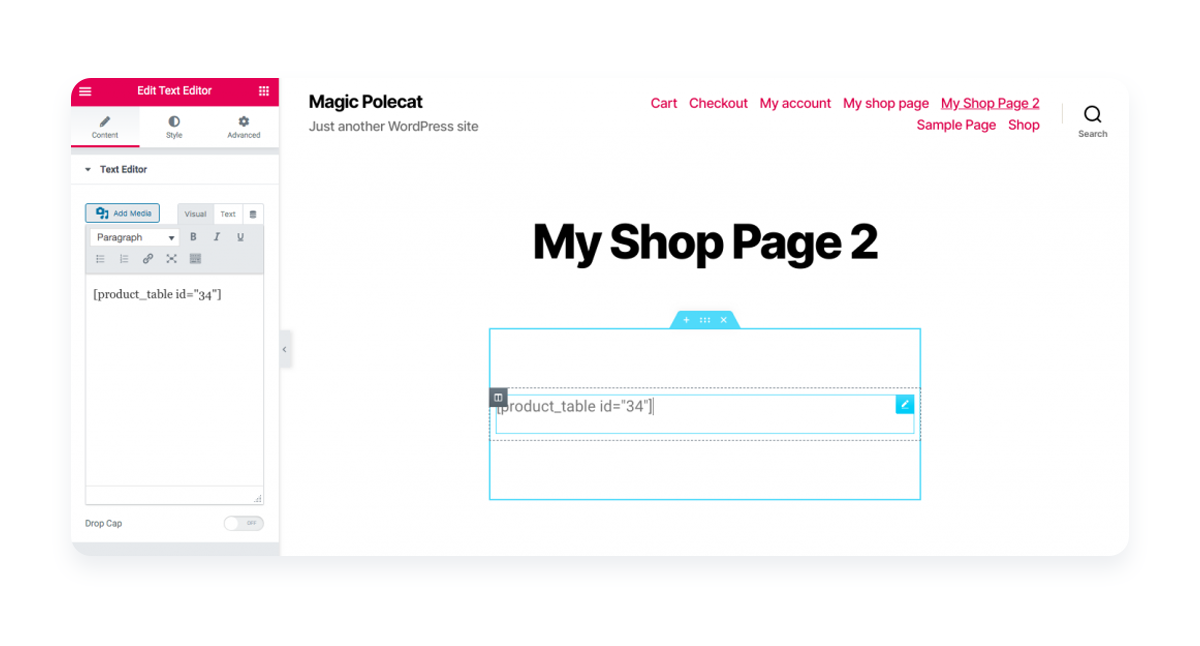
It’ll show you a page with a product table style.

Step 2: Add the Product Widgets that will make up your page
Note: When creating your shopping page, it’s essential to insert several example products, including their required fields, such as product description, a cart button, and the other needed parts, so you can preview those products in the single product template.
Here we marked 13 most important parts that every product page should have:
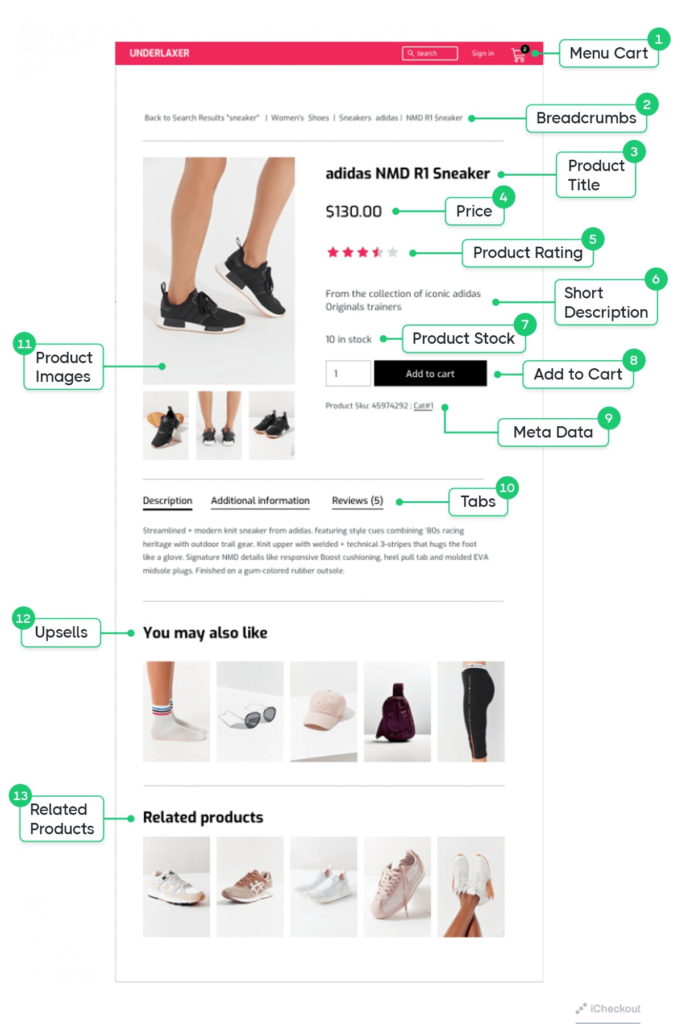
When done with that, it’s time to build the elements that will make up your single product page.
Know that this page is of massive importance for your conversions, and it needs to provide all the necessary information about the products that the customers would be interested in.
For this purpose, you can use a wide range of Elementor’s widgets, such as:
- Product Title widget
- Product image widget
- Woo Breadcrumbs widget
- Short description widget
- Product price widget
- Add to cart widget
- Product rating widget
- Related products widget
- Upsells widget, etc.
Using these widgets in Elementor or any other page builder, you have absolute freedom to play with the elements and move them around.
Also, you can use other widgets to make your single product page more engaging, such as: share buttons, CTA widgets, drop-down menus, etc.
You can add custom fields to the template using the dynamic content feature.
Step 3: Preview the Product Pages

To ensure that your product page has an appropriate design and looks good, you should preview it with several different products and, after making any changes, ensure that everything is good.
Hit the eye icon on the bottom left panel, and then click settings.
Under Preview Settings, choose the specific product you want to display and apply and review to see what it looks like.
How to Customize WooCommerce Products Catalog Page Using Elementor
To design a product catalog page, go back to Elementor > My Templates and create a product archive template.
Then, use an existing template for it, or create one.
Add the Archive Products widget, enter the Archive Title, and customize the design of these pages.

If you want to adapt the style of this page with the design on your single product pages, go back to the single product page and right-click Copy.
Get back to the archive product, right-click and then Paste Style.
Next, in the Archive Products settings, go to Query > Sources and choose the option Latest Products.
Then under Product Category, choose rings. By doing this, in the future, only the ring category will appear.
Slide on Pagination in case you have a long list of products for each category.
You can also design the distance between the columns and the rows in the style tab.
Adjust the colors, fonts, and more according to your brand, and before publishing, choose the conditions to determine where the archive will appear, the same as you did for the single product template.
Hit Publish and your archive page is now live.
How to fix the WooCommerce blank issue on the shop page?
The blank shop page display is one of the most common issues users deal with on WooCommerce.
There are many reasons why the shop page doesn’t show products, but we’ll show you how to fix the most common problems if they happen to you.
1. Shop page configuration
Go to WooCommerce > Settings > Products, and then make sure you use the correct page under the Shop page element.
2. Plugin compatibility
Sometimes, your plugins may cause conflicts that make the Shop page appears blank. You can fix it by deactivating all your plugins and gradually checking which one is exactly causing this problem.
3. Permalinks
Go to Settings > Permalinks and then hit save to update the permalinks and solve this problem.
4. Catalog Visibility
Make sure that the catalog visibility is properly set. To do that, go to WooCommerce > Products and ensure that the products aren’t set as hidden. In case they are hidden, change it.
How to customize the WooCommerce checkout page?
On the WooCommerce store, one of the most crucial pages is the checkout page.
It’s where the customer purchases and pays and where you get a new customer.
Because 7 out of 10 potential customers abandon their shopping carts, you should optimize your checkout page to get as many conversions as possible.
Even though WooCommerce provides a solid default configuration, you need to optimize your checkout page to increase conversion rates on your store maximally.
Some of the changes that you can apply on your WooCommerce checkout page to make it optimized are:
- Create a one-page checkout
- Add, remove, or rearrange the checkout fields
- Change the checkout style and design
- Include upsells and discounts
- Add extra fees for shipping, packaging, etc
We have shown you how to customize the shop page, and now we’ll see how to customize the WooCommerce checkout page.
Customize the checkout page with a plugin
In case you don’t have any coding skills, you can customize the WooCommerce checkout page using a specific plugin.
There are many options available, but for this purpose, we’ll use WooCommerce Checkout Manager for this purpose.
The WooCommerce Checkout Manager has been on the market for a couple of years and has a free version with basic functionalities that you can use, and there are 3 premium plans with more advanced features starting at $19 (one-time payment).
Let’s take a look at what we can do with this tool.

Checkout Manager is a plugin you can use to manage your checkout page.
For example, you can add shipping, billing, and additional fields to your checkout page by simply enabling these options from the plugin’s menu.
What’s great about this tool is that it’s straightforward to use, so it’s pretty good for beginners.
It allows you to show, add or hide fields such as the first and last name, country name, city name, zip code, address, phone number, email, and other areas.
To do this, go to WooCommerce > Checkout and then click the Billing, Shipping, or Additional tab.
There, you have a list of all the possible fields that you can display or hide.
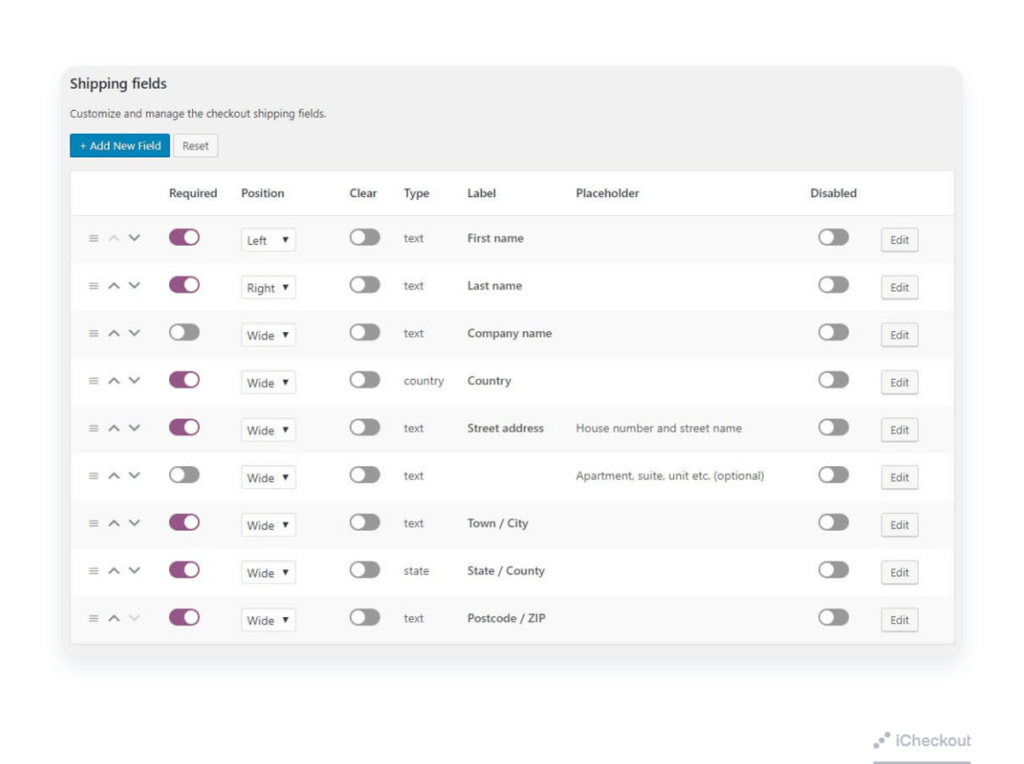
Just click to enable it, and you’re ready to go.
Your checkout page will look like this:

One helpful option this plugin provides is to edit the WooCommerce checkout page and add fees.
You can insert fixed or percentage fees into any core or conditional fields.
This option is useful in case you want to include additional charges such as:
- Express delivery
- Extra charge for shipping to certain countries
- Fees related to different credit cards or payment gateways
WooCommerce offers by default some of these options with extra charges, but Checkout Manager provides you with more control and flexibility in using it.
To add fees in Checkout Manager, go to WooCommerce > Checkout > Billing, and there you’ll see different billing fields that you can enable on your checkout page.
For example, we can add a fee for Express Delivery, and to do that, we’ll need to create a new field.
Press the Add New Field button, select the type of field and enter the name of the new field.
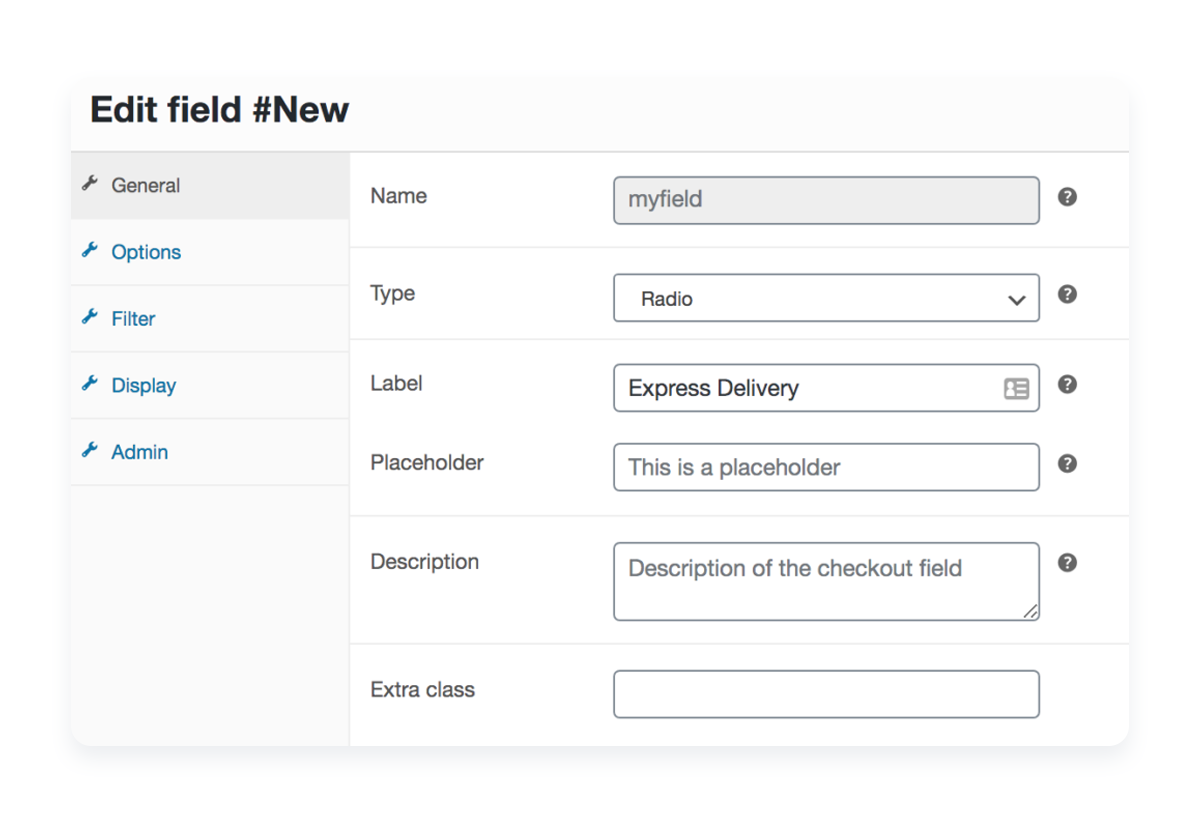
Then, go to the Options tab and add two labels: Yes and No.
If the customer selects Express Delivery, we’ll add an extra charge of $15.

Save your changes, and you’re done! When the customer selects the Express Delivery option on your checkout, an extra shipping fee of $15 will automatically be added to their cart.
Create conditional fields on your checkout page
Besides adding fields and fees, you can also customize the WooCommerce checkout page by creating conditional fields to improve the user experience.
Go to WooCommerce > Checkout > Billing page and click Add New Field.
Select the type of field you want to create, and fill in the label, description, and other necessary information. It will depend on the type of conditional that you’re making.
After that, check the conditional checkbox on the right, select the parent field and enter the value that the parent field needs to display the conditional field.
After you do it, press Save, and you’re done!
You did it! Congrats
WooCommerce Checkout Manager is an excellent choice for beginners who want to edit the checkout page easily.
The free version is a nice start, but if you want more advanced features, you can purchase the premium plans.
Maybe it’s not perfectly designed, but it works well.
In case you want an optimized, well-designed, and better-converting checkout, in that case, you’ll need some programming skills.
Unless you use some better 3rd-party solution that can provide your customers with a better checkout experience that will help you increase your conversions.
Put your checkout page on automation
Although this plugin may provide you with a checkout, still it’s important to have your checkout well-optimized.
Choosing a conversion optimization tool that provides you with a checkout page and helps you provide discounts, implement cart recovery emails, and increase your conversions can be of the greatest help.
If your customers associate your brand with a good cause, they may be more likely to finish their purchase.
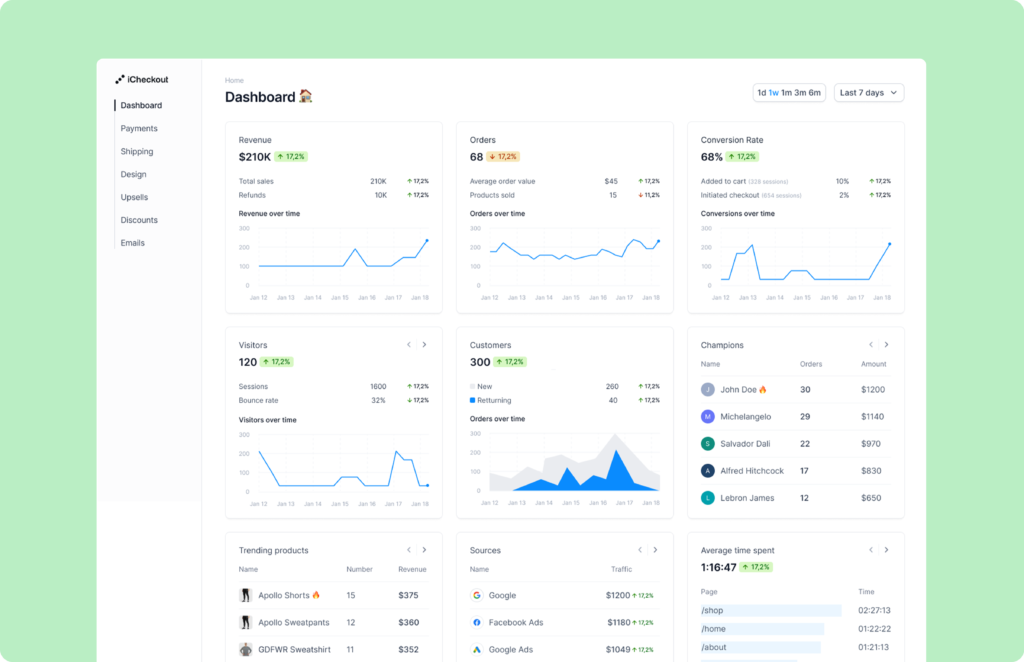
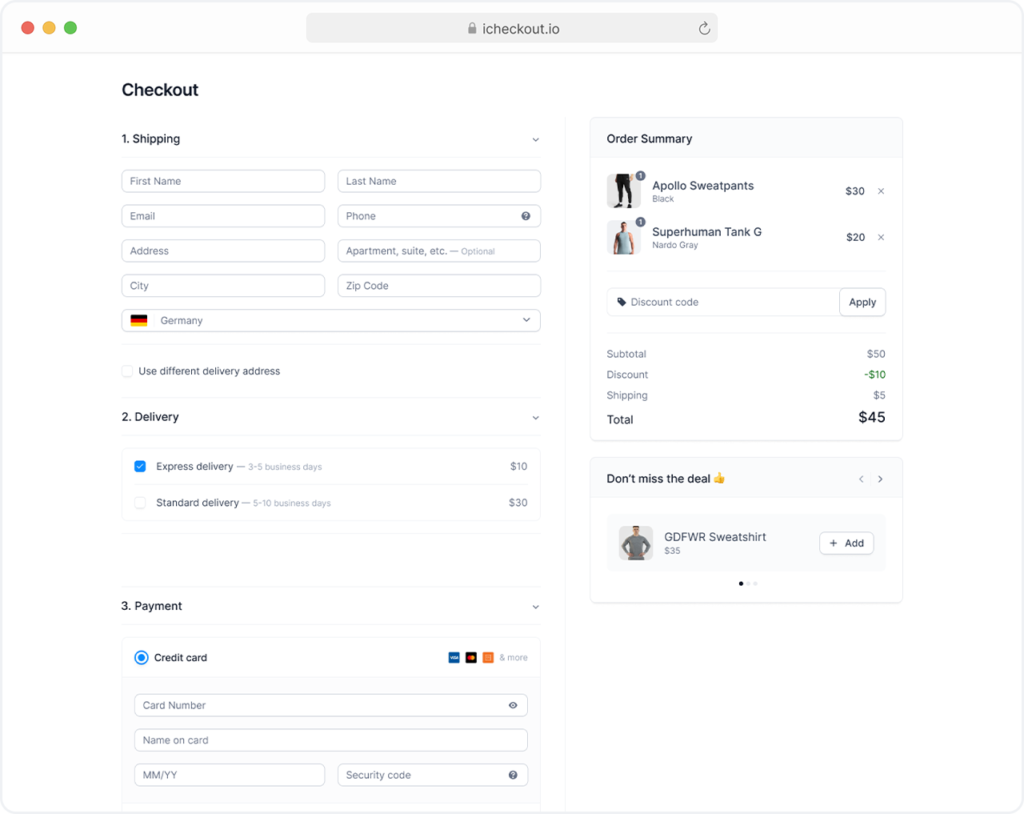
For this reason, we created iCheckout.
We believe that customers shouldn’t waste time filling in details that can automatically be filled in.
That’s why we implemented iCheckout’s smart fields – fields that are automatically ticked and pre-selected.
85% of online purchases are made using mobiles.
That’s why all customer interactions in iCheckout are masterfully crafted with a mobile-first approach – to provide the smoothest checkout experience of all time.
With thousands of Ecommerce elites, we’ve built the ultimate checkout process that redefines the purchasing experience while keeping it secure, easy, and seamless.
iCheckout helps you leverage the power of social proof and reviews at every step of the checkout process and increase your revenue by 21% through automatic discounts.
The smartest upsells you have ever seen.
Using iCheckout on your store, customers shouldn’t spend more than 25 seconds on the checkout page.
You are two clicks away from setting up the CRO tool that will skyrocket your business – literally.
Things like these shouldn’t be hardcoded, and we are here to help you save time and focus on one thing that truly matters – scaling.
iCheckout is about to release the beta soon, so you can test the tool and see how it fits your eCommerce needs.
Join our waitlist, and be among the first beta users when iCheckout gets live!


